
This section will cover the development side of my visual novel project, explaining my proess learning and using the Renpy engine for the first time. Found at: https://www.renpy.org/.
Although I have not finished the development of my game yet (I plan to have a demo completed very soon for the end of year showcase exhibition), I have learnt a lot about simple coding in renpy during my FMP. And I used this knowledge to create multiple example screenshots of my visual novel that were taken in-game in the engine.
Below is the first version of the game that I made during E1, with the old assets. It was just a rough/ short test that I did whilst learning the basics of renpy – like dialogue, changing scenes and character position/ transitions.
The final game code/ script is completely different from this first version, but I just wanted to show the progress here.
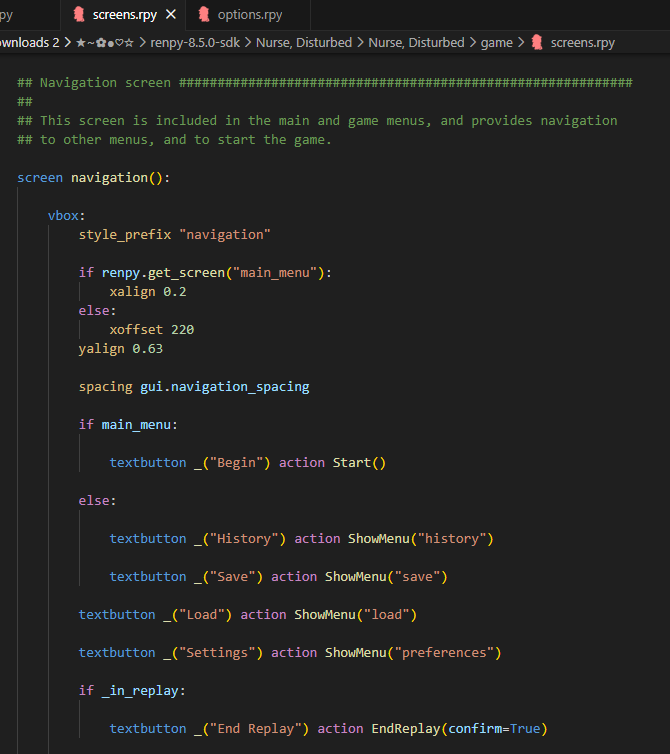
First I want to show the files that I have placed into the game folder – containing the game and gui assets. It was important to name all of these files correctly especially in the gui folder, as the image names are already defined in the code.
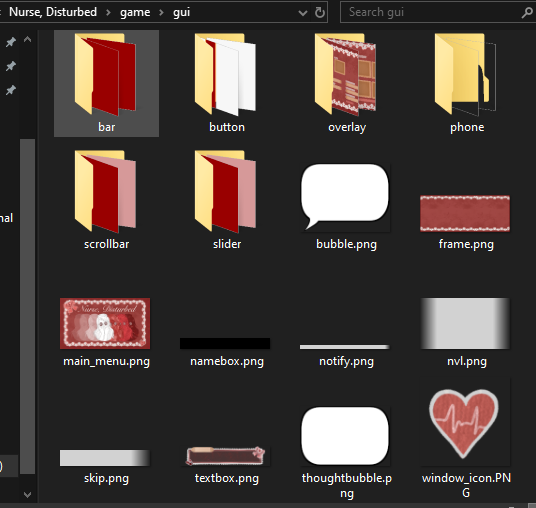
GUI:
In the gui folder, there are still some of the default assets there as I only replaced what I needed/ wanted to use within my game.
I had to edit the code for gui – for things like separate images for different menus, the colours of text, position of the assets, etc.
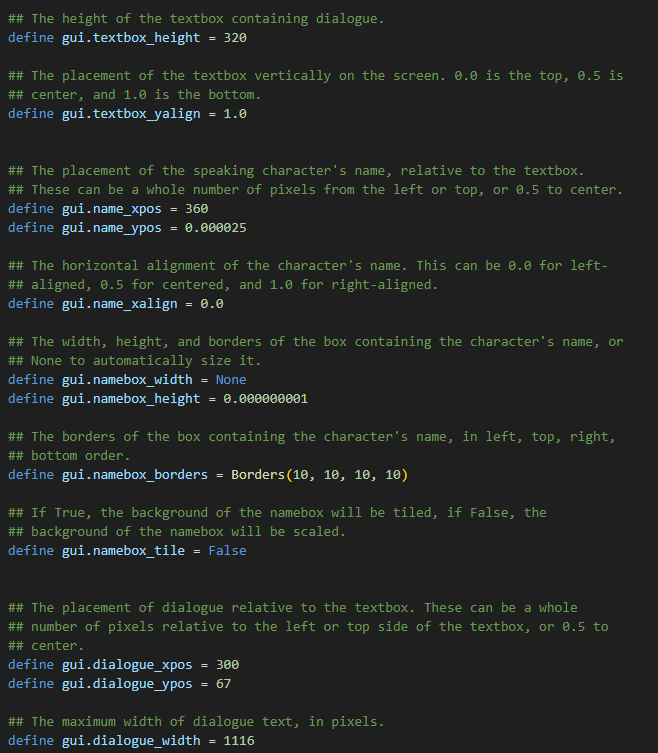
Below is most of the code that I edited for the gui assets and menus. Showing the text colours, positions of textbox and text. I input code to give the dialogue text an outline so that it could be easily read. As well as, changing the positon of the option buttons so that they would fit around my main menu screen, I also changed the names of some buttons – e.g. ‘start’ to ‘begin’.


For all of the coding work that I learnt, I used the in-engine tutorial as well as multiple online resources – like the renpy online guides, youtube videos and online forums.
Here are the specific resources I used for GUI customisation help.
https://www.renpy.org/doc/html/gui.html#
Script:
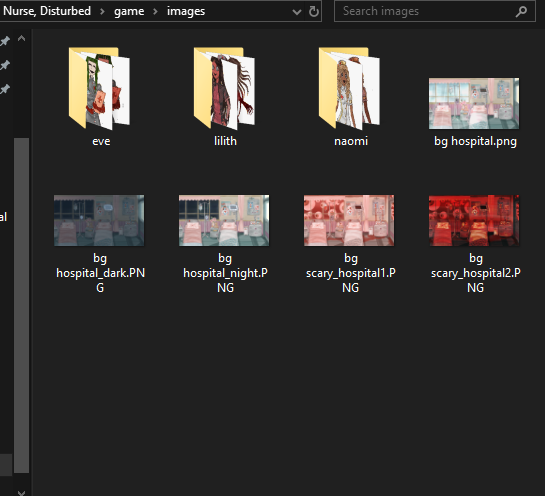
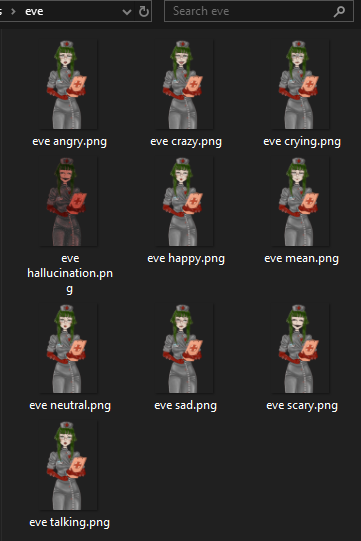
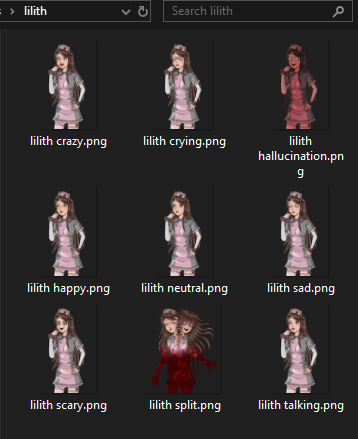
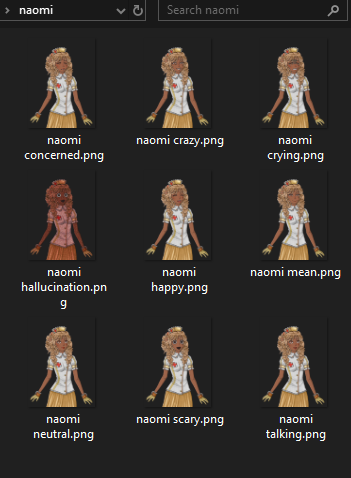
Next, for the actual game content – the script code file. I learnt to accurately write the code for dialogue/ narration, displaying images and changing scenes. It was important to accurately name all of the assets so that they would be found by the code – e.g. naming the backgrounds ‘bg ___’ and the sprites with their character names then the emotion.
Below are the sprites in their respective folders and their file names.
Firstly, within the script code I had to define the characters and the letter that would be associated with them so that writing the dialogue is quicker.
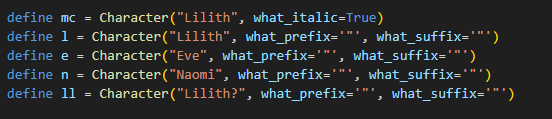
I defined all 3 of the characters, along with Liliths narration, which I put in italics, whilst the speaking I made to be in quotation marks – so that it is obvious what is speaking and what is narration. I also made a character called ‘Lilith?’ that is for Liliths other personality – to add some mystery/ question on if it is really Lilith who is speaking.
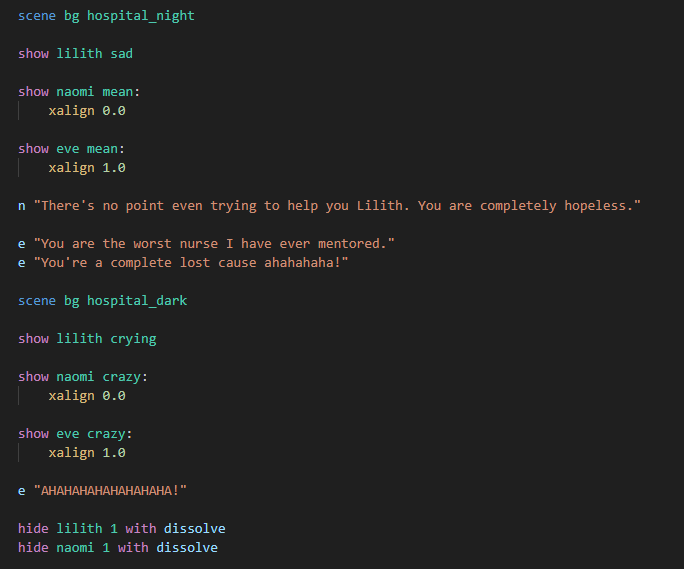
Below is an example showing the other techniques that I used for the script. Such as:
- Using ‘scene’ to show the backgrounds.
- ‘show’ for the character sprites.
- xalign for the position of the sprites (if there is no xalign, the sprites will be in the middle of the scene).
- defined character letters and quotation marks for dialogue.
- ‘hide’ to remove sprites with a transition.
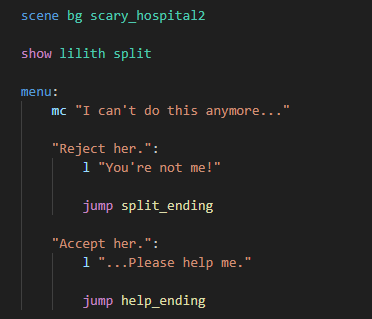
I also added in 1 choice for the end of the game – as it is only a short visual novel and more about showing off art and a simple story. This choice is significant for the story and horror theme though and utilises the Lilith split personality sprite for an end of game jumpscare/ shock.
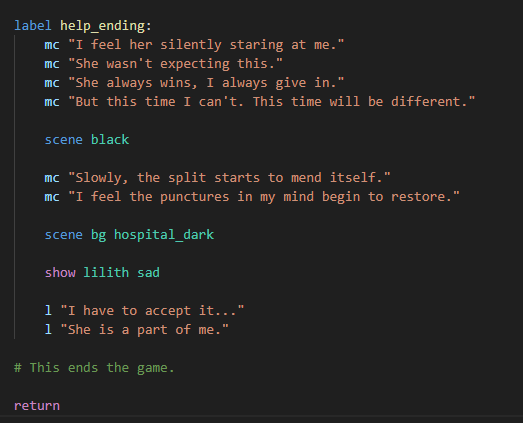
I learnt how to create menus to impliment choices into the game. This choice also decides on the ending – bad (split) end or good (help) end. Below is the code for the choice menu and the endings that come after depending on what option is chosen.

Below are some more resources that I used to help me whilst learning renpy – specifically making the script.
https://www.renpy.org/doc/html/menus.html
https://lemmasoft.renai.us/forums/viewforum.php?f=8
For the final visual novel demo – completed for the exhibition, I am going to finish the 5-10 minutes of script, add music and sound effects and more varied scene transitions.
In the next post I will exhibit the current state of the visual novel in a video and multiple example promotional screenshots!